Showing posts with label ax2009. Show all posts

Sunday, April 5, 2015

Budgeting in AX 2009 - Overview

Budget Allocations

AX has the ability to use predefined allocation rules to perform generated allocations. Generated allocation is the distribution of posted or fixed amounts to combinations of destination accounts and dimensions at any time, for which system generates new Journal entries distributing the amount based on an allocation formula.

Allocation can be set by various methods in Ax, which includes:
- Basis
- Fixed percentage
- Fixed weight
- Spread even

The Allocation process in the system is divided into 3 segments.
  • §  Ledger allocation rules definition
  • §  Process Allocation request
  • §  Allocation Journal.


Ledger Allocation Rules definition: - The first step in allocation is to define the allocation rules.
Creation of allocation rules requires the allocation code, allocation validity as Start Date & End Date. Then, select one of the allocation methods as fixed percentage, Basis, Fixed Weight, Spread even.
After selecting the allocation method, define the Rules for the Source Ledger account. Source Ledger accounts and dimensions can be selected where the expenses has been incurred.
Define the destination account & dimensions where the amount needs to be allocated. Also define the actual percentage or Basis based on which source amount should be allocated to destination. Once destination is defined the Ledger allocation rules are completed.

Process Allocation: -Once the Ledger Allocation rules are defined, the unique rule code will be generated. Refer the rule code in process allocation request to process the allocation entries (based on the allocation rules the system will reallocate the cost to the respective department.)
After selecting the rule code, provide start date and end date of rules and reason codes with remarks. Process the Allocation request and this generates the financial entries in allocation journal.
The allocation process collects one or more values from a source data record and distributes the totals of the values to one or more accounts or account and dimension combinations according to an allocation rule that is defined using the Ledger allocation rule form.

Allocation Journal: -Allocation journal shall show the entries passed by Process Allocation step. System would generate the entries on running the Allocation request. System shall reverse the Source Ledger a/c and book the entries against destination ledger accounts as per the allocation rule.

Budgets


Budgets are defined for each Chart of Accounts dimension wise, where dimension can be a Category/cost center/department/projects/sub department which are identified as Dimensions.

AX supports budgets to be created at the General ledger level. The budgets are maintained at the chart of account level with relevant dimension and the variance analysis will be made at the chart of account level.

Sales and Purchase Budgets:


The budgeting for sales and purchases is carried out in the Accounts Receivable & Accounts Payable module and the same will be transferred to GL. However the accounts that are affected during the transfer are only the Sales revenue accounts and the purchase inventory accounts.

The sales and purchase forecast can be entered by quantity and amount and the allocation keys will be defined to split the amount over a period of time when the forecast are transferred to GL budgets.

Budget Revisions:


There can be scenarios where the budgets are prepared and approved for the complete year, however the budgets can be revised as per the requirement. The existing budgets can be modified or a new budget created with the revised figures. 


Friday, April 3, 2015

Price Tolerance


Price tolerance defines the percentage by which the invoice net unit price can exceed the purchase order net unit price, and still be considered within the allowable tolerance for invoice matching discrepancies.

Invoice matching is the process of matching vendor invoice, purchase order, and product receipt information. Differences among these documents are called matching discrepancies. Matching discrepancies are compared with the tolerances that are specified. If a matching discrepancy exceeds the tolerance percentage or amount, match variance icons are displayed in the Vendor invoice form and in the Invoice matching details form.

For example, you enter a purchase order with one line item for 500 pencils at a price of 1.00 each. The purchase order is approved and submitted to the vendor. The vendor ships 500 pencils, and you enter a product receipt for 500 pencils at a price of 1.00 each. The inventory cost for the pencils is updated with this price.

An invoice arrives for 500 pencils at a price of 1.10 each. Your legal entity policy allows a 5 percent net unit price tolerance for this category of item. A price of 1.05 would be acceptable, but 1.10 is not. When you enter the invoice information, a price matching discrepancy is identified and you can save the invoice until the discrepancy is resolved.

A vendor price tolerance group defines the group of vendors for which such a “price tolerance” is applicable. In other words, it is a vendor group to which a specified price tolerance is applicable. In the vendor form, this field describes the “identifier” for the vendor group.

Happy learning.!

Sunday, March 22, 2015

Accept Errors - Report as Finished


The Accept Errors check box allows users to post the Report as Finished journal without any validations and generating any error logs.

The checks include, but are not limited to:
  • -          Whether all the items are deducted from the inventory
  • -          All the prerequisite operations are completed
  • -          Picking List posting quantity
  • -          Whether the produced quantity is less than the RAF quantity

If you UN-check (not selected) it will generate the error info log and lets you know where the error occurred while doing Report as Finished.

For Example:
Quantity for production is 100
Picking List is 95
Report as Finished is 98
If the Accept Errors checkbox is ticked, the system will post the Journal without validating against the picking list and without generating any error logs.
If it is un-checked, the system will throw an error after validating against the Picking List.

Zero Quantity


The Accept Error checkbox does not work while reporting Zero finished quantity. Whether or not the checkbox is selected, the system will throw an error if Zero quantity is being posted after production.
A quantity must be allocated for the system to post the costs relating the production. 
In such a case, post one quantity as RAF and then write off the quantity after the production has Ended.


Sunday, March 15, 2015

Fixed Assets - Depreciation Conventions


Depreciation is a periodic transaction that typically reduces the value of the fixed asset on the balance sheet, and is charged as an expenditure to a profit and loss account. Therefore, a main account is usually used for crediting the periodic depreciation on the balance sheet. An offset account is an account in the profit and loss part of the chart of accounts.

Various depreciation methods and conventions are available in the system. The purpose of the methods is to allocate the depreciable value of the fixed asset into fiscal periods. The depreciable value of the fixed asset is the acquisition price, reduced by a scrap value, if any.

Depreciable value = Acquisition price – Scrap Price (if any)

When using depreciation conventions, if  the last depreciation run date for an asset is modified, which then causes some depreciations to be skipped, the depreciation for the last year might be more than or less than is expected. The depreciation is adjusted by the number of depreciation periods affected by the modification of the last depreciation run date.

Depreciation Conventions


During the first year in service, depreciation is calculated using the depreciation method and averaging convention for the asset. The resulting depreciation amount is distributed over the period of time from the date it was placed in service to the last day of the year.

The Mid-month (1st of month), Mid-month (15th of Month), or Full Month averaging convention must be used only if the fiscal periods are set up in a manner that matches the calendar year.

The averaging convention does not change the dates an asset is retired or placed in service. It only uses a ‘pre-defined’ date to calculate the depreciation based on the averaging convention defined for the asset.

The following averaging conventions are available in Fixed Asset Management:

  • None:  Assets will begin depreciating on the date it was placed in service and will be retired on the retirement date.


  • Half-year:   Assets begin depreciating on the Placed in Service Date. In the year of disposal, assets are retired on the last day of the first half of the year.

Only half of the depreciation amount is taken in the year an asset is acquired. This also applies to the year in which you dispose of an asset and to the year in which the life is complete, based on the original life of the asset. The asset doesn’t depreciate after the first half of its final year.
  • Mid-month (1st of month):  Assets that are placed in service in the first half of the month — days 1 through 15 — will begin depreciating on the first day of the month.

Assets that are placed in service in the second half of the month — day 16 through end of month — will begin depreciating on the first day of the next month.
Assets with a retirement date in the first half of the month — day 1 through 15 — are considered retired on the last day of the previous month.
Assets with a retirement date in the second half of the month — day 16 through end of month — will be retired on the last day of the month.
  • Mid-month (15th of Month):  Assets that are placed in service at any time during the month will begin depreciating on the 16th of the month. Assets that were placed in service in February will begin depreciating on the 15th of the month.

Assets retired at any time during the month will be retired on the 15th of the month of the retirement date. Assets retired in February will be retired on the 14th of the month.
  • Mid-quarter:   Assets that are placed in service at any time during the quarter will begin depreciating on the middle day of the second month of the quarter.

Assets retired at any time during the quarter are considered retired on the middle day of the second month of the quarter.
For Example: Consider a January to March quarter.
Asset A002 was acquired on 31st January; Asset A008 was acquired on 9th March and Asset A015 was acquired on 31st March. With the Mid-Quarter depreciation, all these asset will begin depreciating from the 15th of February in the same year.
Asset Z009 was retired on 21st January; Asset Z021 was retired on 12th February and Asset Z045 was retired on 21st March. Given the convention, all these assets will be considered retired on 15th February.
  • Full Month:   Assets that are placed in service at any time during the month will begin depreciating on the first day of the month.

Assets retired at any time during the month are considered retired on the last day of the previous month.

Saturday, March 7, 2015

Increasing the Service Life of a Fixed Asset


Increasing the Service Life of an Asset is carried out to revise the estimates done when the Asset was first acquired and increase the periods for depreciation for the Asset.
This change is not an accounting / estimation error. It is an inherent and continual process in a business.

For Example: DAT (Default Company) purchased machinery for $150,000. The company made the following estimates at the time of purchase (Year 1):
  • Useful life: 15 years
  • Salvage value: $0
Now, during Year 6 – after five (5) years of using and depreciating the machinery – the company understands that the machinery can be used for 15 years more from the date of change (or for a total of 20 years from the date of purchase), rather than the previous estimate. This decision is based on various factors including machine performance and maintenance as well.

In the accounting scenario, the change in depreciation from revision of useful life is calculated as follows (for Journal Entries):


There is no need to undo the previous calculations for depreciation or make any adjustments thereof. The depreciation henceforth would be adjusted based on the formula stated above.

In AX too we have a provision for increasing the Service Life of an asset long after it has been commissioned.

The Setups and prerequisites are as follows:

Prerequisite - Require Reason Code:


Reason Codes urge users to justify/ provide reasons for performing any action in the system. 

Since an increase in the Service Life of an asset has substantial Financial Implications for the business, requisite setups are available in the system to prompt the user to enter the reasons for the Update.

This setup is not mandatory, but suggested. It depends on the Business hierarchy and whether or not these rules are applicable to the scenario.

To enable Reason Codes, check mark the Require Reason Code for Fixed Asset change in General Ledger >> Parameters

Path: General Ledger >> Setup >> Parameters >> Fixed assets tab


The Reason code requirements for transactions are additional transactions for which the reason code needs to be updated. This is optional setup.

Prerequisite - Reason Code Setup:


The Reason code setup is available in the Basic module. This setup is required if Reason Code Requirement is selected in the previous step.
Path: Basic >> Setup >> Reasons

Enter the Reason Code and Default Comment. Check mark the box for Asset.


Click Ctrl+S to save

Now that we have our Reason Codes setup, we can proceed with the update.

Increase Life of FA


Path: General Ledger >> Common Forms >> Fixed Asset Details.


Select the Fixed Asset to increase life for and click on Value Models:


Go to Depreciation Tab:


In the Depreciation header, there are fields for:
  • Service Life
  • Depreciation Periods
  • Depreciation Periods Remaining

These fields can be updated based on the requirement. When the Service Life is increased, the Depreciation Periods and Remaining Periods are automatically updated. When the Depreciation Period is updated, only the Remaining Periods are updated, but the Service Life is not updated.

Make the changes. Click Ctrl + S to save.

The system prompts for Reason Code:

Enter the Reason Code by selecting from the drop-down menu and Click OK
The Updates will be made for the asset.

To view the changes made to an Asset, Click on Inquiries >> Change History in the Value Models form.


Thursday, March 5, 2015

Workflow History Form


The Workflow History form is under Basic >> Inquiries (AX2009)

Now, this form is quite fascinating because of the way it works - Its picks up the User id and then displays only those workflows that are relevant to them. For the Admin, all workflows are visible.

Here's the catch - All workflows are visible to the users assigned to the Admin group. If a user has complete Admin rights over all the modules, but is not a part of the Admin group, it still shows only related workflows.

Peculiar... Yes...

I came across this phenomenon when a client was re-assigning couple permission and were facing a problem with this form, even with complete access on the other modules. Admin group could not be added because of obvious reasons.

After a lot of assigning, re-assigning and manipulating with the user rights, I decided to dig into the code...

And Viola.!!

There is a very specific query that executed when the form is run. This query does not fetch the user id only if the user belongs to the Admin user group. Any other group, with complete access over the system - it will still fetch the user id and display specific details.

Being a Standard form, it is not advisable to play around with the code here. Just to test the case, we added another user group along with Admin, to see if it works. It did.

But.

Not sure why, but the workflows started throwing a Stopped (error) after completion - totally out of the blue. When we restored the original code, the error disappeared as silently as it had crept in. I am still on a lookout for the reason for this unusual behaviour, without any pointers.

The final establishment of the entire experiment was that the Workflow History form has a dependency on the Admin group and not on Users' access on the system. Secondly, fidgeting with the query in the code was not a very good idea.

Anyone out there with a similar problem, there does not seem to be a feasible solution here... In case any of you stumbles upon a hidden area, please share.

Happy daxing :)

Wednesday, March 4, 2015

Fixed Asset Additions


An addition to a fixed asset is a maintenance to or an add-on item for a fixed asset. Like Engine Oil for an automotive or an additional hard disk for a desk Computer.
An addition is considered part of a fixed asset, but is not a separate asset. Typically, an addition is maintenance or an improvement and is related to a write-up adjustment.

The addition is done as follows:

Click General Ledger >> Common Forms >> Fixed Asset Details.


Select the fixed asset to create the addition for.
Click Additions.


Press CTRL+N to create an addition.On the Overview tab, keep the default addition number and type a name for the addition, such as Laptop Battery or Wiring

Enter additional details, such as the acquisition date, unit cost, and quantity.

On the General tab, enter values for other fields as appropriate:


If the addition increases the service life of the fixed asset, select the Increases service life check box, and then modify the Service life field in the Value models form.
If not, leave it unchecked. The addition will not increase the Service Life of the asset.

Press CTRL+S to save the addition


Thursday, February 12, 2015

Exchange Adjustment - AX 2009

When multiple currencies are used, the exchange rate for the original transaction currency might differ from the exchange rate that is used during the conversion to the accounting currency. To recognize these differences in the exchange rate, the amounts in the main accounts have to be adjusted. The process that is used to make those adjustments is called a foreign currency revaluation or an Exchange Adjustment.

Revaluation can be done in Accounts Payable, Accounts Receivable and General Ledgers. However, the General rule of thumb is to perform the revaluation in the Accounts Payable and Accounts Receivables.

It is not suggested to perform Revaluation for Vendor and Customer Transactions in the General Ledger Module as these transactions will not reflect in the AP and AR modules respectively. Hence, Currency Revaluation is done for Accounts Payable and Accounts Receivables modules.


Prerequisites:

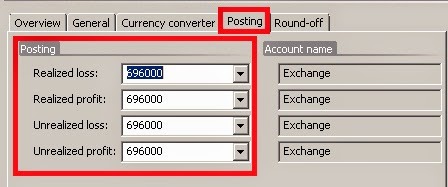
Before you can perform an exchange adjustment, the profit and loss ledger accounts for exchange adjustments must be. This setup is done in the General Ledger

Path: General ledger >> Setup >> Exchange rates >> Posting tab.

These accounts are essential to be setup in case when the organisation is dealing with multiple currencies.
Note: It is not necessary to use the same accounts for all the postings. Multiple accounts can also be used, depending on Company policy.

Revaluation process will generate unrealized gains/ losses whereas Settlement will generate realized gains/ losses.

Once these accounts are setup, the Exchange Adjustment can be carried out. These accounts must be setup for all the currencies that will be used.

Exchange Adjustment:

The procedure to run the Exchange Rate Adjustment is the same in Accounts Payable and Accounts Receivables Modules. The Exchange Adjustment is run from the Periodic Section in both the Modules.

Path: Accounts Payable >> Periodic >> Exchange Adjustment

Simulate an Exchange Adjustment:

Simulation is carried out to analyze the adjustments that will be made to the respective accounts after Revaluation. The simulation generates a report with all the entries and adjustments that will be made when the actual adjustment is carried out.

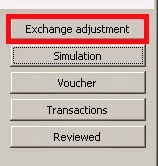
To run a Simulation, click on Simulation Button on the Exchange Adjustment Form
The following parameters need to be selected:
  • Method
  • Considered Date
  • Date of Rate

In the Method field, the following options are available:
  • Standard - Make exchange adjustments based on the Exchange rate used on the date specified in the Date of rate field.
  • Minimum - Make an exchange adjustment if a loss occurs, but not if a profit exists.
  • Invoice date - The program offsets any exchange adjustment that is not already offset, as on the date of Invoice. This causes the transaction being valued at its original value.
The Considered Date is the Date up to which the system has to fetch the “Not Settled” (Open) transactions to perform the exchange adjustment for.

The Date of Rate is the date to be considered for the exchange rate.

The default method is Standard.
The Considered Date and Date of Rate are usually the same date.

After the parameters are selected and the dates are entered, Click on OK.
The Simulation will generate a report with the adjustments that will be made if the Exchange adjustment is run. This report is used to analyze the differences and postings that will be made to the different Vendor/ Customer Accounts. 

Once the postings are verified, the Exchange Adjustment can be carried out.

Run an Exchange Adjustment:

To run the exchange adjustment, click on the Exchange Adjustment button in the form:

The parameters on the form:


Method: Standard
Considered Date and Date of Rate: As required
Use posting profile from: Select the posting profile that is used for the exchange adjustment transactions:
  • Posting – The posting profile of the vendor transaction is used.
  • Select - The posting profile is determined by the posting profile in the Posting profile field.
Posting Profile: If Select is selected in the Use posting profile from field, the posting profile of the exchange adjustment transactions is determined by the posting profile specified in this field.

Select among the posting profiles that have been set up for the company in the Posting profiles form.

Dimension: Select the kind of dimensions that are posted on the exchange adjustment transactions:
  • None - No dimensions are posted on the exchange adjustment transactions.
  • Table - The dimensions of the vendor account are posted on the exchange adjustment transactions.
  • Posting - The dimensions of the transaction that is being adjusted are posted on the exchange adjustment transactions.
Print: Select this check box to print a report with details about this run of the exchange adjustment.
This report is printed on the go and is not saved in AX for future reference.

Transaction Text and Notes: These fields are for Users to enter any remarks or comments regarding the Adjustment.

Click OK to run the Adjustment.

The Exchange Adjustments are now successfully posted.

View Exchange Adjustment Transactions:

Once the Exchange Adjustment is run, the Transactions and the Vouchers posted can be verified.

To view the Ledger Transactions posted by the Exchange Adjustment, select the Adjustment entry that was created and Click on the Voucher Button in the Exchange Adjustment Form.

In order to view the Customer or Vendor Transactions posted by the Adjustment, Click on the Transactions Button on the form.


P.S. Leave your comments below :)

Thursday, February 5, 2015

Credit Note for Invoiced Orders - AX 2009

There are several instances where Purchase Orders have to be processed for returns. There are also instances where the User has used incorrect dimensions or other details on the Purchase Order and it has been invoiced.

In such scenarios, a Credit Note is created.

Even in cases where the Product Receipt is processed with the wrong dimensions, it is better to invoice the order, create a credit note and then create a fresh order with the Correct entries.

Following is a step by step instruction to create a Credit Note from an Invoiced PO:

Select the Purchase Order for which the credit note needs to be created.
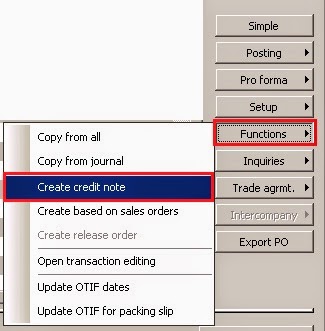
Click on Functions >> Create Credit Note

A form opens. In the Header of the form, uncheck the check box for Delete order lines. This is to have a track of the original as well as the reversed entries:

Note that there is a check box that is marked for Invert Sign. This ensures that the credit note is creates with a negative sign in the quantity and the amount fields.

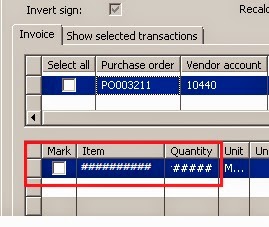
The form has two sections, similar to the PO form. In the header are all the PO details and the Line details are in the lower section.

  • Select the respective purchase order in header.
  • In the line level, if the purchase order has multiple line, select particular line(s), which have purchase returns.
  • Edit the return quantity.
  • Click on OK button.

Depending on whether the entire order must be reversed or only some lines on the Order, select the lines by checking the Mark box


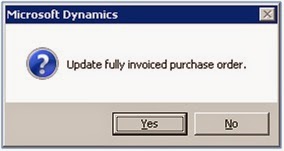
On clicking the OK button, the system pops a dialog box asking for confirmation:


Click OK.

In the PO level, we now have an additional line with the quantity and Net amounts fields with negative values.

A credit Note must also be processed in the same way that a PO is processed.

Confirm the PO:; Postings button >> Purchase Order

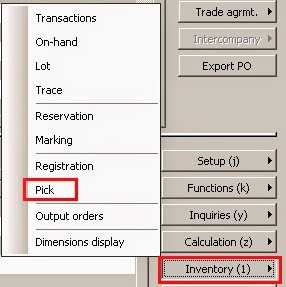
For a return order, the Quantity must be Picked from the inventory.
To pick, select the line with the negative quantity, Click Inventory button in the line level. 


In the picking form, check the Auto-create box against the line. A line will be automatically created in the Pick section of the form.

Click on Post All to post the picking list.

The Issue status changes from Reserved Physical to Picked.
Close the form and return to the PO form.

Here, Post Receipts List:: Postings >> Receipts List
Up to this stage, the PO has Open Order status

Post Packing Slip:: Postings >> Packing Slip
Once the Packing Slip is posted, the Order Status changes to Received

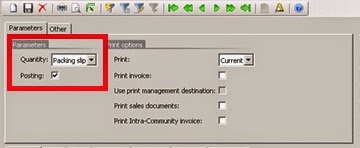
Now, Invoice the Order by selecting Quantity as Packing Slip:


Now the Order status changes to Invoiced.

Now, go to Inquiries >> Invoice

It is observed that invoice is posted with negative amount. Click on Voucher Button. The Amounts are reversed from the original accounts.

The original entries posted are completely reversed by the posting of the credit note.

Care must be taken when there are multiple currencies involved. In case of foreign currency, there will be a difference in the original posted amount and the credit note amounts where the dates of the Invoice and Credit Note are different.

To avoid the differences in the amounts, the Credit Note must be posted on the same date as that of the Invoice. Then there will not be a difference in the amounts.

Further, where there is Weighted Average Method followed, the system posts the negative inventory with the Weighted Average Cost updated in the inventory and the difference amount (if any) is adjusted in the Inventory Offset account.

All other impacts on the accounts are reversed as is.